
jQuery Grid Plugin : jqGrid
jQuery로 프로젝트 수행중 extjs의 grid기능을 맘껏 쓸수 없을까 하다가 데꾸벅! jqGrid라는 아주 좋은 녀석을 발견하였다.
여러가지 테마를 사용할수 있지만 구미에 맞도록 CSS를 바꿔 보았다. extjs의 경우 UI자체를 수정하기가 어려운 반면 이녀석은 상당히 수월하게 바꿀수 있었다.
소스다운로드 :
 jQueryGrid.zip

HTML
<!DOCTYPE HTML PUBLIC "-//W3C//DTD HTML 4.01 Transitional//EN">
<html>
<head>
<meta http-equiv="Content-Type" content="text/html; charset=utf-8" />
<title>서학리조트 컨텐츠</title>
<link rel="stylesheet" type="text/css" href="style/css/contents.css" media="screen" />
<link rel="stylesheet" type="text/css" href="style/css/grid.css" media="screen" />
<script type="text/javascript" src="style/js/jquery.js" charset="utf-8"></script>
<script type="text/javascript" src="style/js/jquery.jqGrid.js" charset="utf-8"></script>
<script type="text/javascript" src="style/js/contents_04.js" charset="utf-8"></script>
</head>
<body>
<table class="tbl_tit02"><tr><td>담보 사항</td></tr></table>
<div class="gridJ" style="width:780px"><table id="gridList" class="scroll" ></table></div>
<div id="rsperror" title="서버에러나오는곳"></div>
<input type="button" value="선택된Row 데이터가져오기" id="a1" />
<input type="button" value="Row삭제" id="a2" />
<input type="button" value="마지막Row추가" id="a3" />
<input type="button" value="id가 13인 Row선택하기" id="a4" /><br />
<input type="button" value="tax컬럼 숨기기" id="a5" />
<input type="button" value="tax컬럼 나타내기" id="a6" />
<input type="button" value="id가 13 에디팅하기" id="a7" />
<input type="button" value="저장" id="a8" />
<input type="button" value="취소" id="a9" /><br />
<input type="button" value="header값 스타일변경" id="a10" />
<input type="button" value="셀값 스타일변경" id="a11" />
<input type="button" value="데이타초기화" id="a12" />
<input type="button" value="그리드 width/height조절" id="a13" /><br />
<input type="button" value="HTML 테이블을 그리드화하기" id="a14" />
</body>
</html>
js file
var lastsel3;
$(document).ready(function(){
$("#gridList").jqGrid({
url:'server.json',
mtype: 'GET',
datatype: "json",
colNames:['인벤토리','날짜', '고객', '수량','세금','합계','비고'],
colModel:[
{name:'id',index:'id', width:100,align:"center",key:true},
{name:'invdate',index:'invdate', width:120,editable:true,sorttype:"date",formatter:'date', formatoptions:{srcformat:"Y-m-d",newformat:"d-M-Y"}},
{name:'name',index:'name asc, invdate', width:100,editable:true,editoptions:{size:"20",maxlength:"30"}},
{name:'amount',index:'amount', width:100, align:"right",editable:true,editable:true,editrules:{number:true,minValue:100,maxValue:350},formatter:'currency',formatoptions:{thousandsSeparator:","}},
{name:'tax',index:'tax', width:100, align:"right",editable:true,edittype:"select",editoptions:{value:"FE:FedEx;IN:InTime;TN:TNT;AR:ARAMEX"}},
{name:'total',index:'total', width:100,align:"right",editable:true,edittype:"checkbox",editoptions: {value:"Yes:No"}},
{name:'note',index:'note', width:150, sortable:false,editable:true,edittype:"textarea", editoptions:{rows:"1",cols:"20"}}
],
rowNum:30, <-- 가끔씩 이넘이 말썽부릴때가... -1로 해놓으면 가져온 데이타 모두 뿌려줍니다
height:278,
sortname: 'id',
sortorder: "desc",
viewrecords: true,
multiselect: false,//앞에 체크박스처리
multikey: "",//multikey: "ctrlKey/shiftKey",
editurl: "server.json",
/*onSelectRow: function(id){ //row가 선택되었을 경우
if(id && id!==lastsel3){
jQuery('#gridList').restoreRow(lastsel3);
jQuery('#gridList').editRow(id,true,pickdates);
lastsel3=id;
}
},*/
/*jsonReader: {//스크롤할때마다 가져오기
repeatitems : true,
cell:"",
id: "0"
},*/
afterInsertRow: function(rowid, aData){
switch (aData.name) {
case 'Client 1':
jQuery("#gridList").setCell(rowid,'total','',{color:'green'});
break;
case 'Client 2':
jQuery("#gridList").setCell(rowid,'total','',{color:'red'});
break;
case 'Client 3':
jQuery("#gridList").setCell(rowid,'total','',{color:'blue'});
break;
}
},
loadError : function(xhr,st,err) {
jQuery("#rsperror").html("Type: "+st+"; Response: "+ xhr.status + " "+xhr.statusText);
},
imgpath: 'style/grid'
});
$("#a1").click( function(){
var id = jQuery("#gridList").getGridParam('selrow');
if (id) {
var ret = jQuery("#gridList").getRowData(id);
alert("id="+ret.id+" invdate="+ret.invdate+"...");
} else { alert("Row를 선택해주세요");}
});
$("#a2").click( function(){
var su=jQuery("#gridList").delRowData(12);
if(su) alert("id가 12인 Row삭제"); else alert("이미 지워졌삼~");
});
$("#a3").click( function(){
var datarow = {id:"99",invdate:"2007-09-01",name:"test3",note:"note3",amount:"400.00",tax:"30.00",total:"430.00"};
var su=$("#gridList").addRowData(99,datarow);
if(su) alert("마지막Row추가 성공- 서버쪽 업데이트처리해주세요"); else alert("처리가 되지 않았음.");
});
$("#a4").click( function() {
$("#gridList").resetSelection();
$("#gridList").setSelection("13");
});
$("#a5").click( function() {
$("#gridList").hideCol("tax");
});
$("#a6").click( function() {
$("#gridList").showCol("tax");
});
jQuery("#a7").click( function() {
jQuery("#gridList").editRow("13");
this.disabled = 'true';
jQuery("#a8,#a9").attr("disabled",false);
});
jQuery("#a8").click( function() {
jQuery("#gridList").saveRow("13");
jQuery("#a8,#a9").attr("disabled",true);
jQuery("#a7").attr("disabled",false);
});
jQuery("#a9").click( function() {
jQuery("#gridList").restoreRow("13");
jQuery("#a8,#a9").attr("disabled",true);
jQuery("#a7").attr("disabled",false);
});
jQuery("#a10").click( function() {
$("#gridList").setLabel("tax","Tax Amt",{'font-weight': 'bold','font-style': 'italic'});
});
jQuery("#a11").click( function() {
$("#gridList").setCell("12","tax","",{'font-weight': 'bold',color: 'red','text-align':'center'});
});
jQuery("#a12").click( function() {
$("#gridList").clearGridData();
});
jQuery("#a13").click( function() {
$("#gridList").setGridWidth(500);
$("#gridList").setGridHeight(400);
});
jQuery("#a14").click(function (){
tableToGrid("#htmlGrid");
$("#htmlGrid").setGridWidth(810);
});
});
function pickdates(id){
alert(id);
}
server.json
"page": "1",
"total": 27,
"records": "13",
"rows": [
{
"id": "5",
"cell": [
"5",
"2007-10-06",
"Client 3",
"200.00",
"0.00",
"200.00",
null
]
},
{
"id": "4",
"cell": [
"4",
"2007-10-05",
"Client 2",
"120.00",
"12.00",
"134.00",
null
]
},
{
"id": "3",
"cell": [
"3",
"2007-10-05",
"Client 1",
"50.00",
"10.00",
"60.00",
null
]
},
{
"id": "2",
"cell": [
"2",
"2007-10-05",
"Client 3",
"100.00",
"0.00",
"100.00",
"no tax"
]
},
{
"id": "1",
"cell": [
"1",
"2007-10-04",
"Client 3",
"150.00",
"0.00",
"150.00",
"no tax"
]
}
]
}
소스사용은 자유이나 태클달지 맙시다 ^^ 현재버전의 jqGrid와 틀립니다..
'Scripter > jQuery' 카테고리의 다른 글
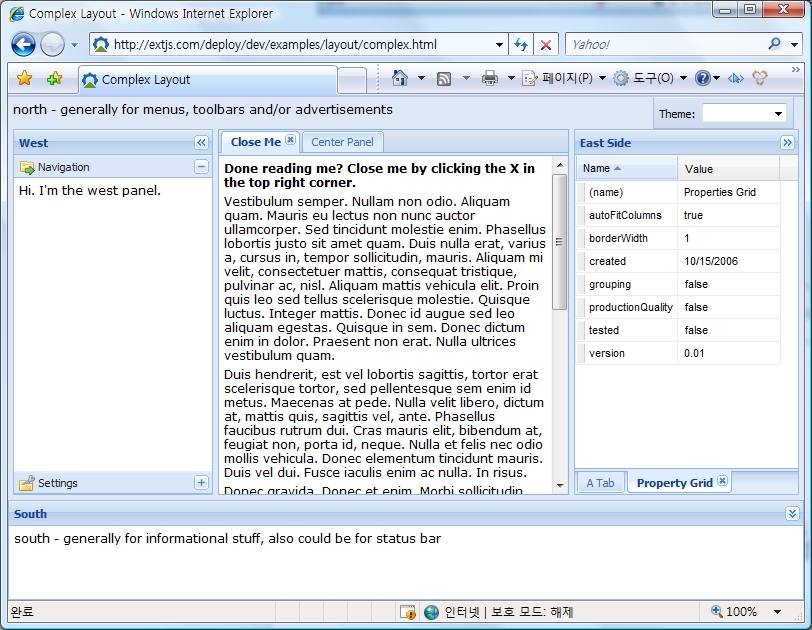
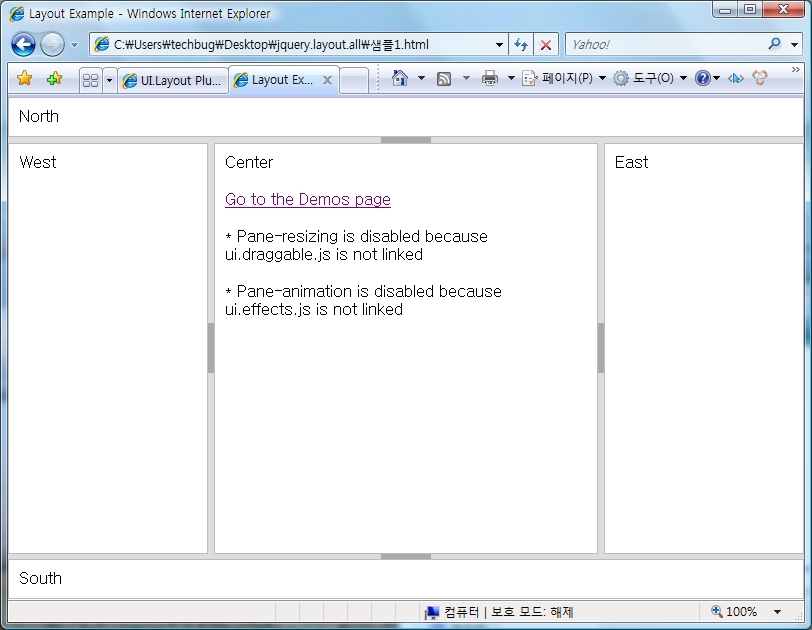
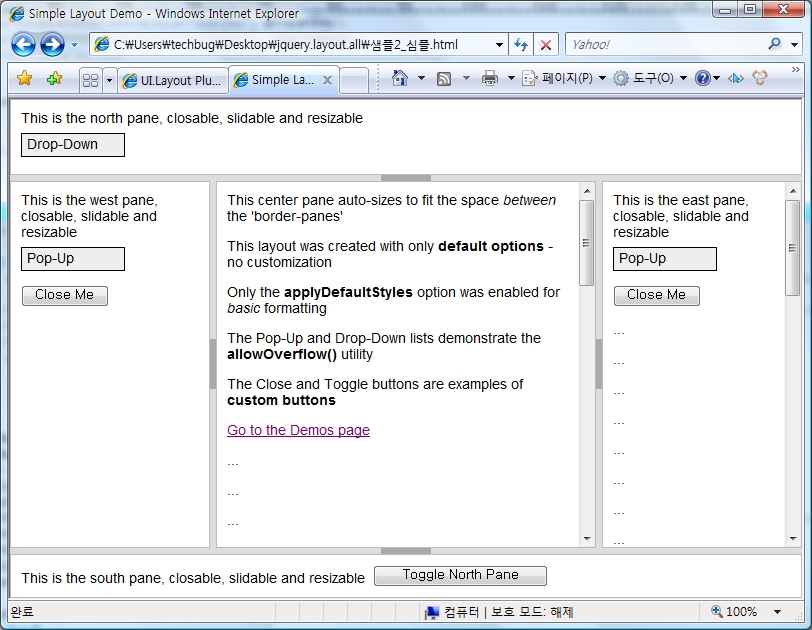
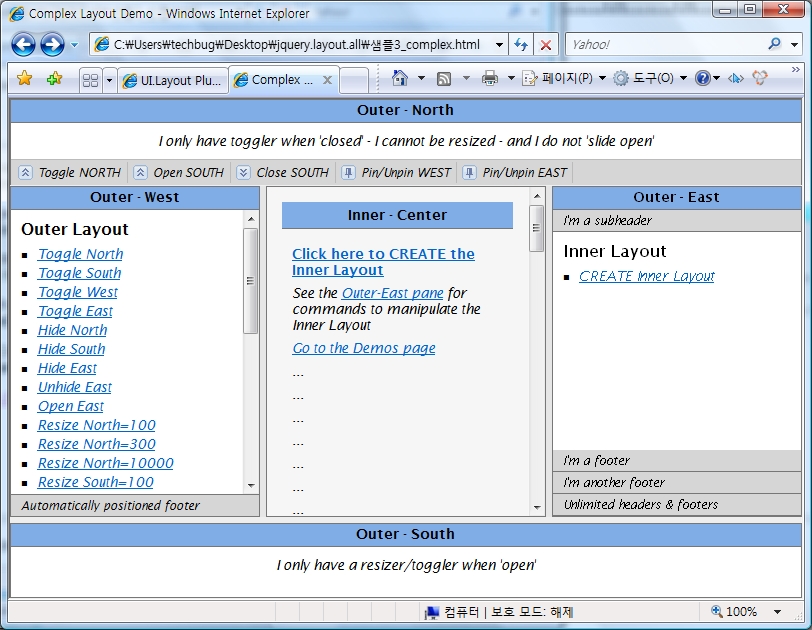
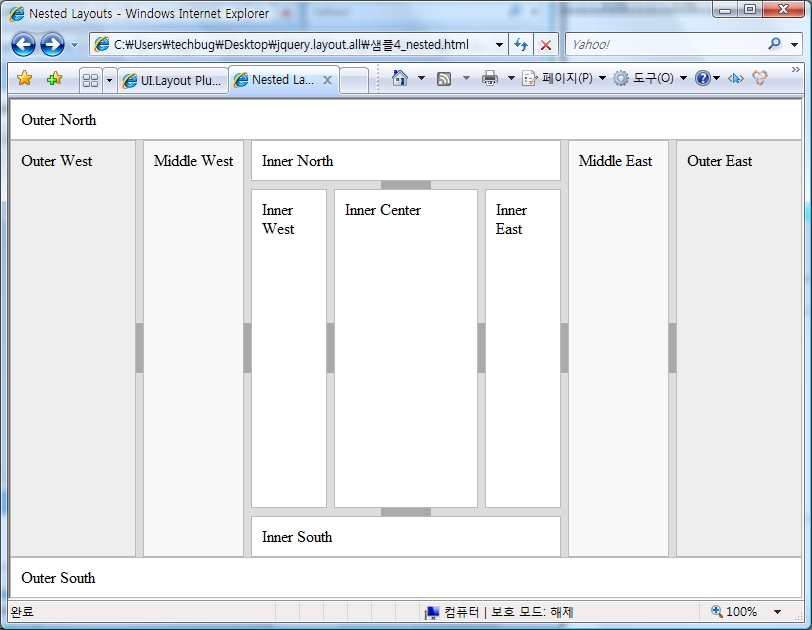
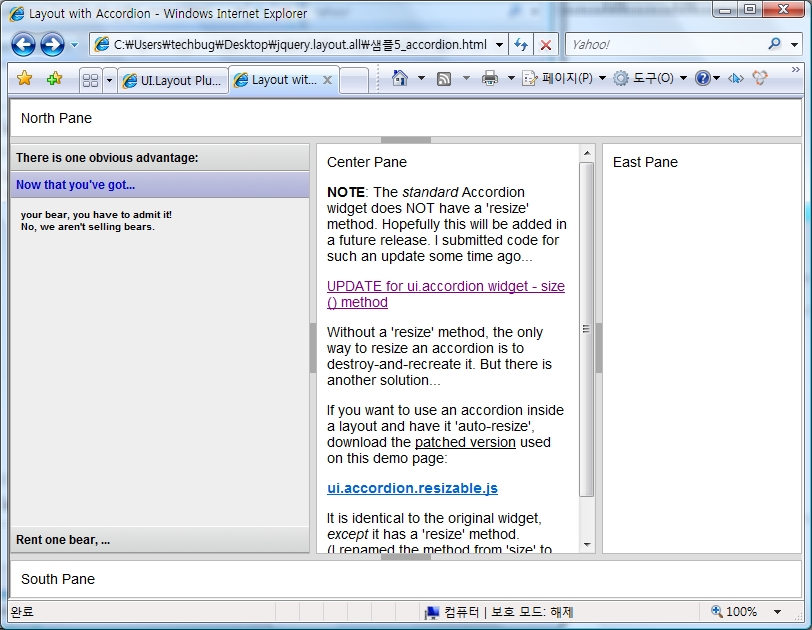
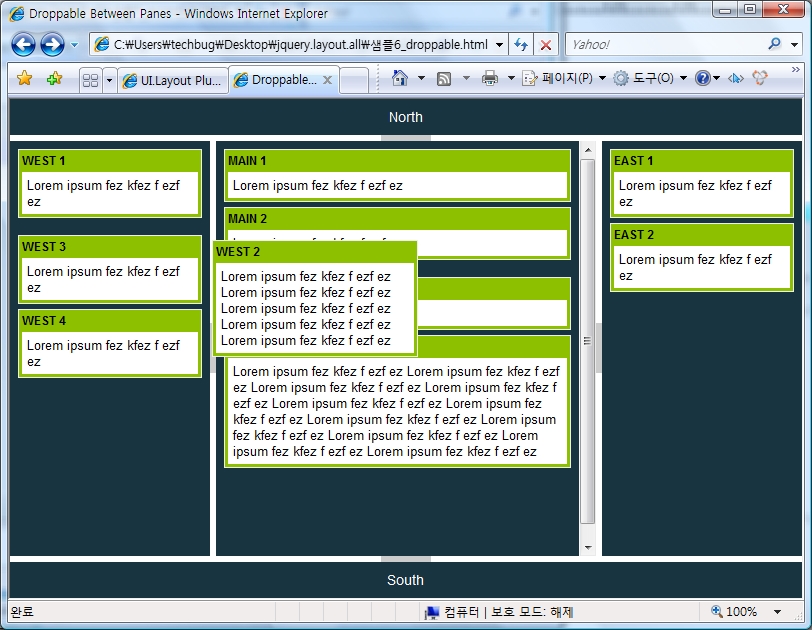
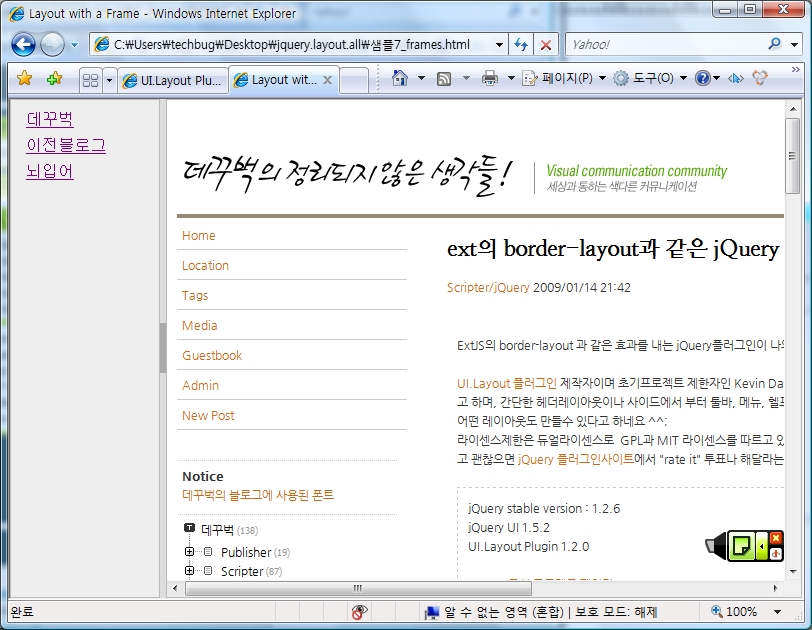
| ext의 border-layout과 같은 jQuery UI.Layout Plugin (0) | 2009.01.14 |
|---|---|
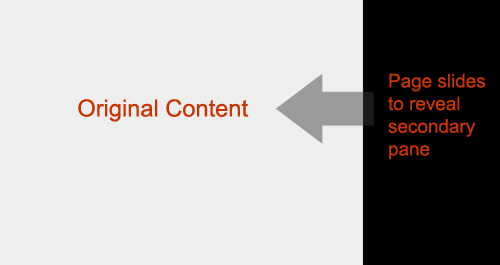
| jQuery pageSlide (0) | 2009.01.12 |
| jQuery 링크에 걸린 파일 사이즈 자동으로 알아내기 (1) | 2008.09.03 |
| jQuery Loading바 구현하기 (2) | 2008.07.08 |
 invalid-file